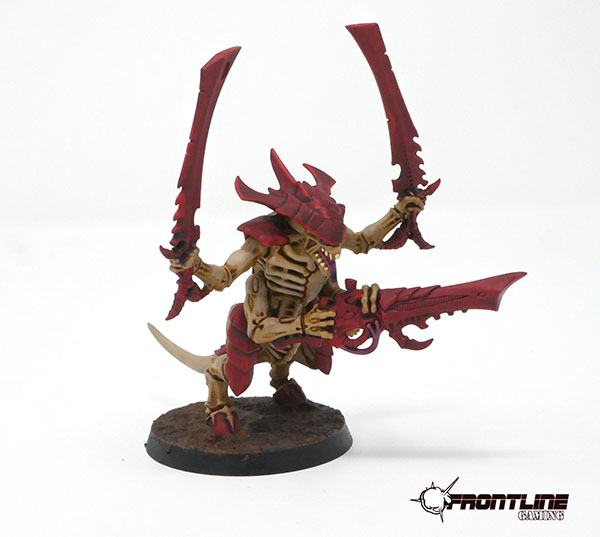
These Genestealers & Broodlord were painted to a Tabletop Plus standard by the FLG Paint Studio.
Consider us for your next miniatures painting commission whether that by Tyranids or any other army!
These Genestealers & Broodlord were painted to a Tabletop Plus standard by the FLG Paint Studio.
Consider us for your next miniatures painting commission whether that by Tyranids or any other army!


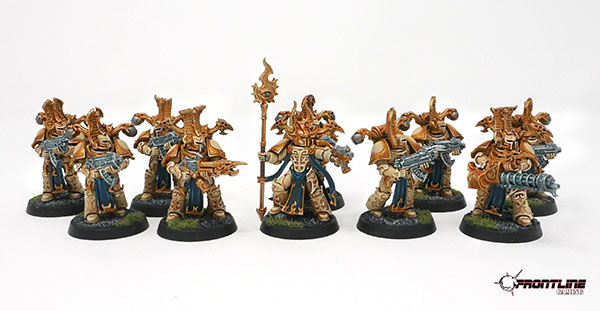
You’ve got to check out these gorgeous alternate color scheme Thousand Sons Rubric Marines!
These lovely models have been painted to a Tabletop Plus standard by the FLG Paint Studio. Consider us for your next miniatures painting commission!


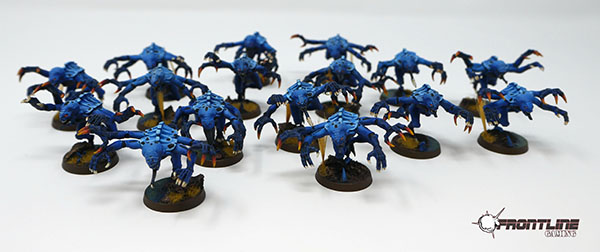
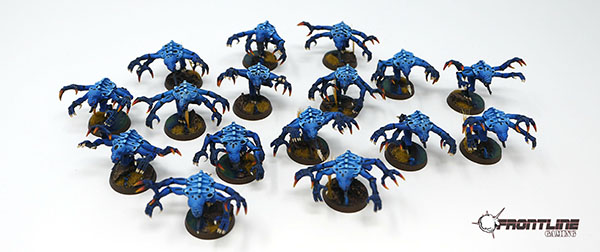
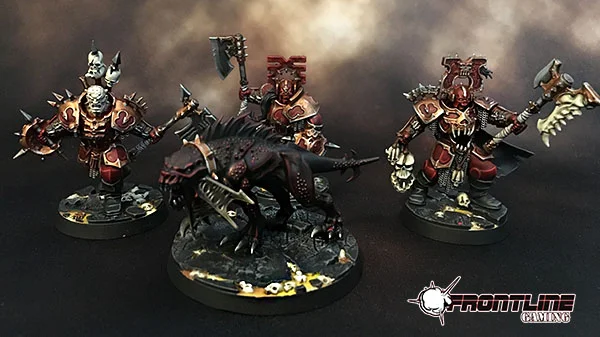
These Tyranids are painted to a Tabletop Standard which is our mid-ranged paint level and is also quite affordable!
The simple paint scheme looks great with the shading and highlight and high contrast colors to create a striking effect. Consider the FLG Paint Studio for your next miniatures painting commission!


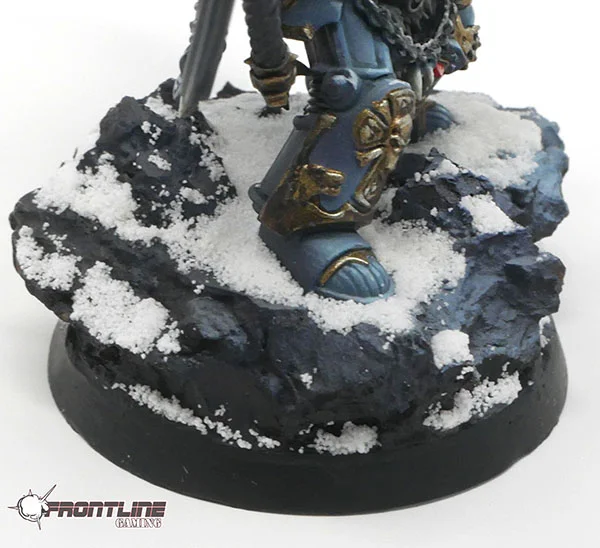
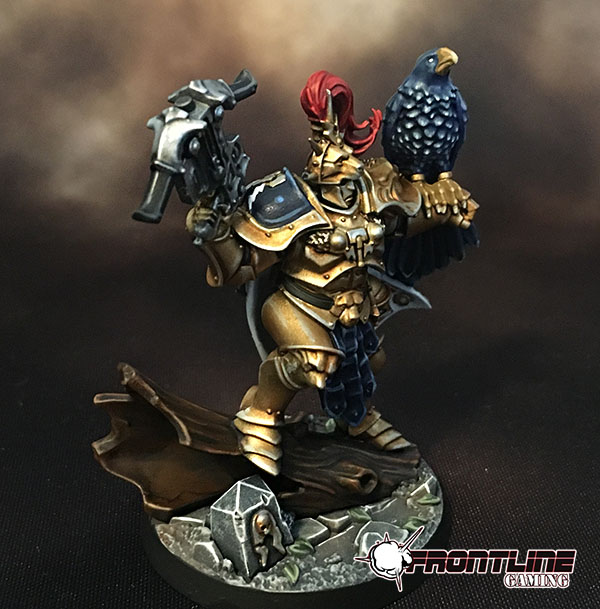
This absolutely stunning Logan Grimnar was painted by the FLG Paint studio!
This masterclass level model is just fantastic! It features a host of advanced painting techniques to produce a centerpiece model that will turn heads. Consider us for you nex miniatures painting commission.


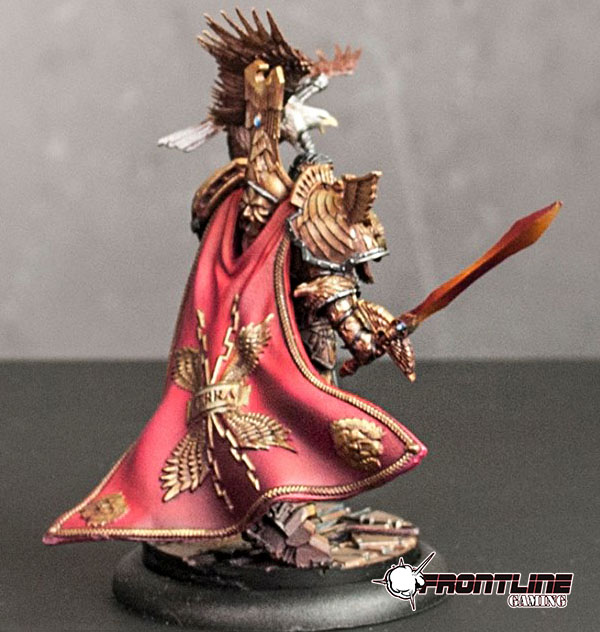
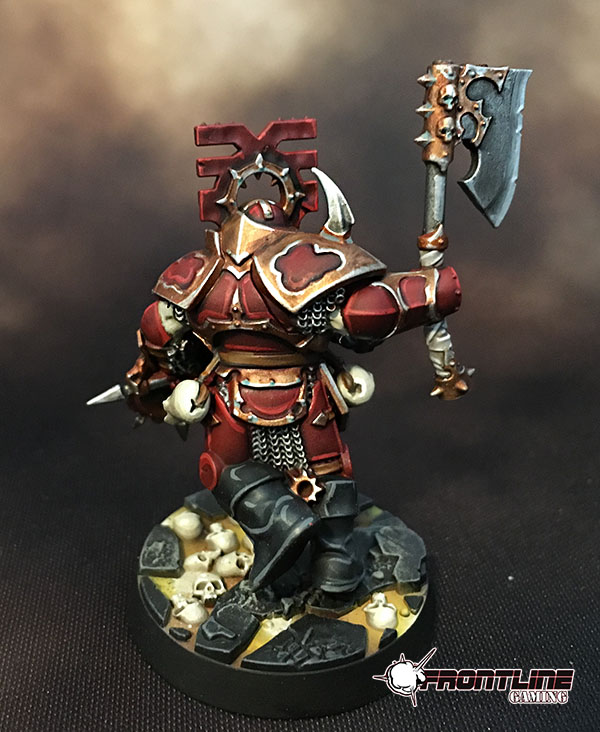
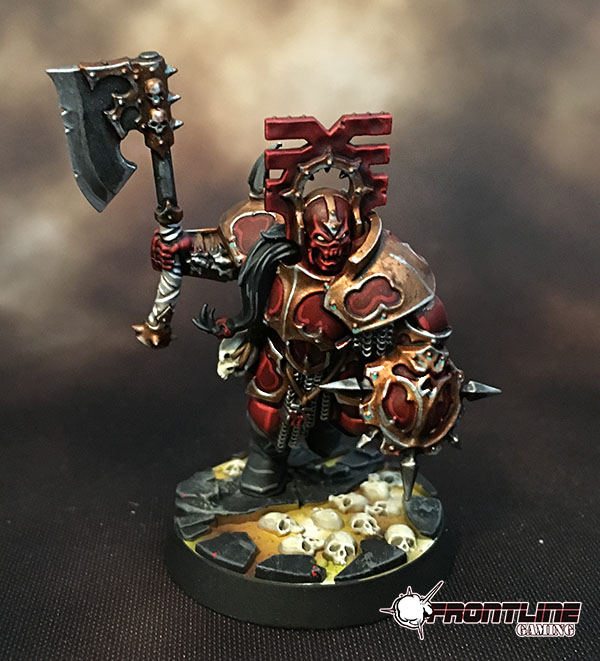
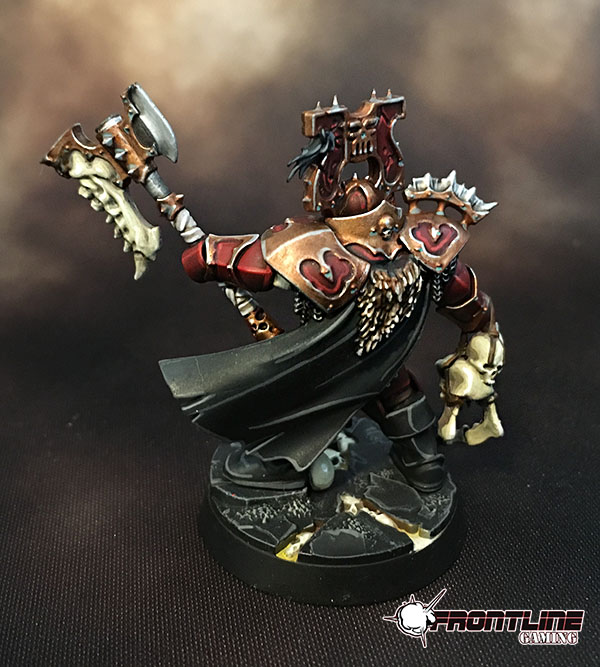
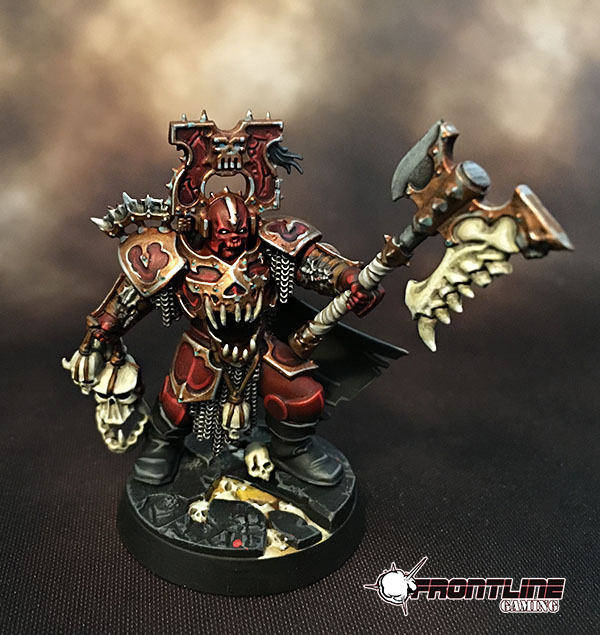
This limited edition Crimson Fists display model came out beautifully and was painted by the FLG Paint Studio!
Consider us for your next miniatures paint commissions, whether it be a single model or an entire army!


This Carcharodon Space Marines painting commission came out really nicely!
With the release of plastic Heresy style armor it's easier than ever to make an army like the Space Sharks! This army also has custom basing and some great decal work which really makes the army stand out.
Consider the FLG Paint Studio for your next miniatures painting commission, be it the fearsome Carcharadons or any other 40k army!


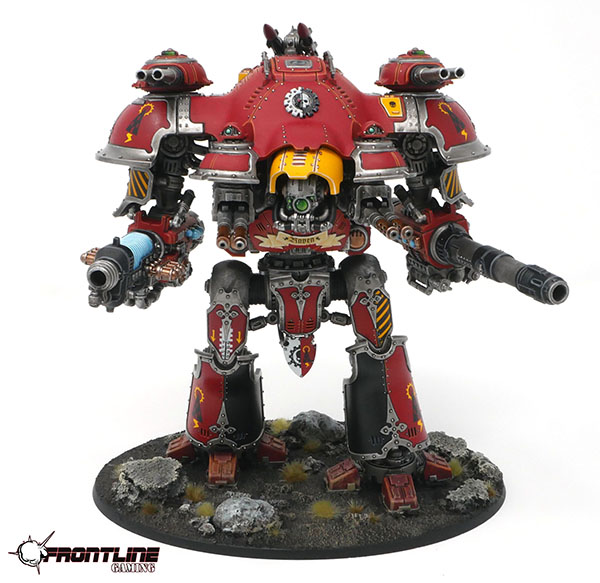
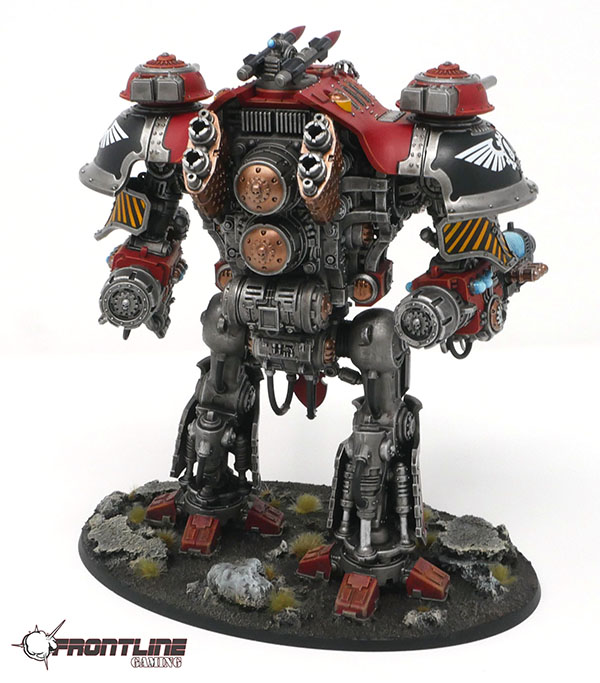
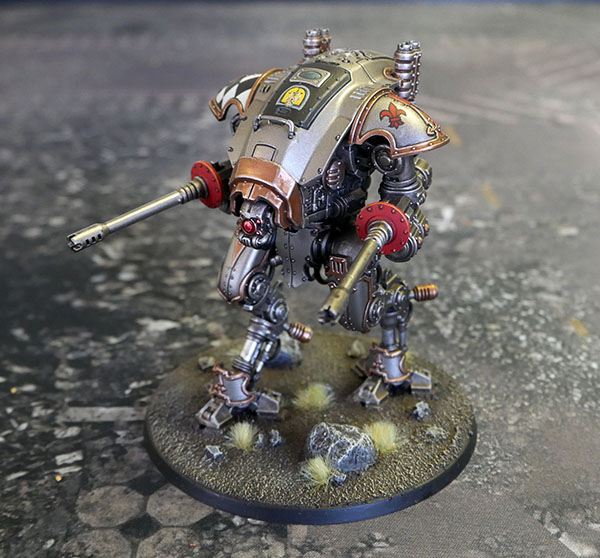
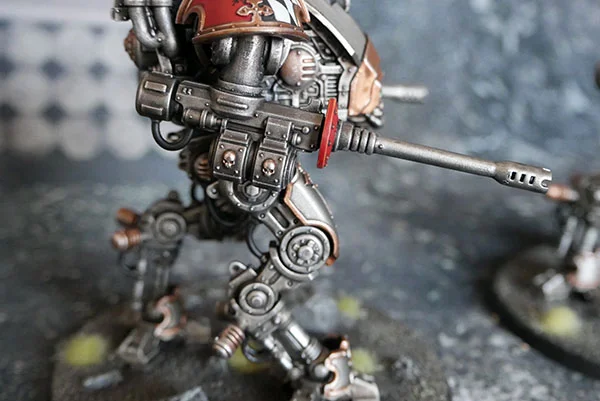
This fantastic Imperial Knight Castellan commission was painted by the FLG Paint Studio in House Raven colors!
The Castellan features some awesome freehand, decals and color choices. Consider us for your next 40k paint commission!
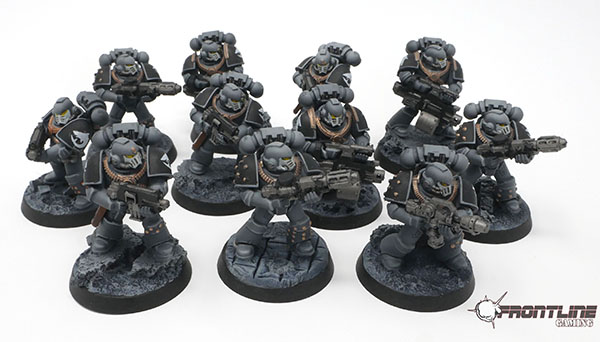
These are both Tabletop Plus paint jobs with Level 3 basing and decals added on.
And as always, you can purchase these models from Frontline Gaming at a discount through their web-cart!


This miniatures painting commission we recently completed came out great! The client had these 40k miniatures painted to a Tabletop Plus standard with level 3 basing. The decals really set them apart though, and we’re happy to do so for your next Warhammer paint commission, too! As always, you can also get these miniatures from Frontline Gaming at a discount as well, to further save money!


Hey guys, Cavalier checking in, commission painter for Frontline Gaming and co-host of Splintermind: The Dark Eldar Podcast back again with the another installment in my Harlequin Detachment Development series this time tackling how to paint the raging hotness that is the Harlequin Skyweaver!
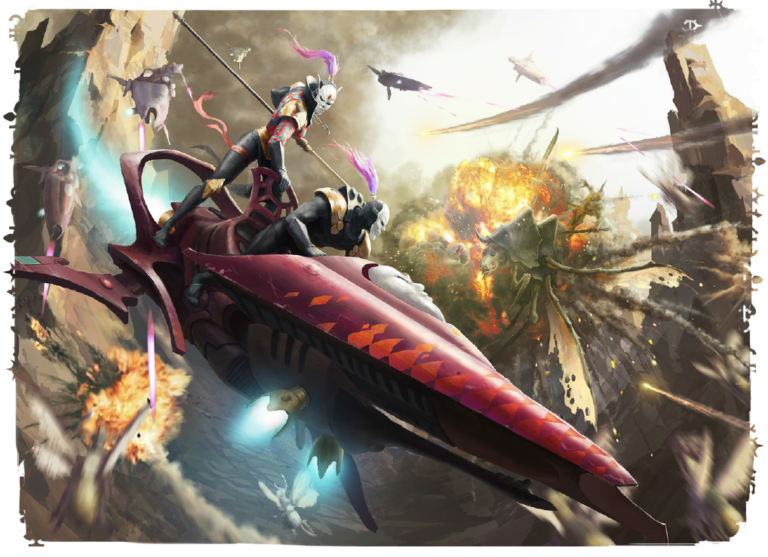
Harlie skyweavers are not only a critical unit on the tabletop but real showcase piece for your army in general. So when tackling them I really wanted them to shine. So my Masque of choice is the Penumbral Masque, a troupe of Harlequins loyal to the Y’nnari and Y’nnead. So to begin with I went with a Khorne Red fade using my airbrush on pure Chaos Black Primer.

This next step was the most crucial. I didn’t want the diamonds to dominate the bike, as I want the overall Y’nnari color scheme to match-in with the rest of my army. Furthermore the riders will also have diamond, so I can still get a very checkered look without overwhelming the sleek stylings of this amazing sculpt.
To do this I hand painted the diamonds first using Celestra Grey and Abaddon Black. I also got in there and base coated the mask near the handle bars as you can see. For reference on how I paint my diamonds please check my previous article here: Painting Diamonds.

Next I jumped in with Ulthuan White to really get those diamonds really bright. You’ll probably think the Celestra Grey reads as pure white in the previous photo, but the Ulthuan Grey does amazing job making it even brighter. Again Ulthuan Grey is the same color as Corax White and paints on a thousand times easier than Ceramite or White Scar. So pro tip there! Also I used the new Nighthaunt Shade on the mask, what amazing new paint!

With that done I painted the saddle. Most of it will be covered up by the rider but he does ride sort of high in the seat so enough’ll show where it’ll look crap if you dont paint it well. Best to get in there before your Harlie mounts up. I went with Dryad Bark, to Mournfang then finished up Skrag to get a nice deep leather look.

I did the gold and brown simultaneously and it couldn’t be easier. Retributor Gold with a Reikland Fleshwash. Then just a touch of Liberator Gold here and there (barely at all) and I call it a day.

The gems and dashscreen are up next. As for the gems I do a simple double crescent on either end of the gem going from Stegadon Scale, to Sotek to finally Temple Guard. I then do a dot of Fenris Grey on either end and then a dot of Ulthuan Grey on either end with just a couple sparkle dots here and there with Ulthuan Grey to complete the look
The screen is a progression of Caliban, to Warp Stone Glow to Moot Green. The radar grid is painted in Ulthuan Grey as well.


To finish it up I apply the same painting progress as I detailed in my in-depth Venom painting tutorial. It is a simple progression of Mephiston, to Evil Sunz, to Wild Rider capped off with just a touch of Cadian Fleshtone on the most extreme points and angles. I also did a 1/2 & 1/2 blend of Mephiston and Khorne Red on the raised area of the bikes fuselage.


Anyway thats it for this time guys. Hope you found the tutorial helpful. For my thoughts on using these guys on the tabletop as tank+titan hunters check out my previous article!
Also if you are interested in exclusive Dark Eldar and all things Aeldari coverage check out our podcast Splintermind the Dark Eldar Podcast which just released our 50th episode.
And remember, Frontline Gaming sells gaming products at a discount, every day in their webcart!
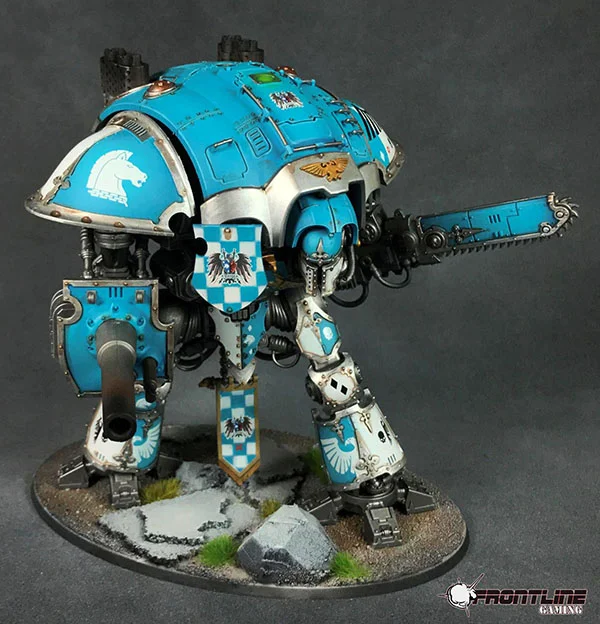
Check out these gorgeous Imperial Knight Helverins and Crusader recently painted by the FLG Paint Studio! Consider us for you next miniatures painting commission.


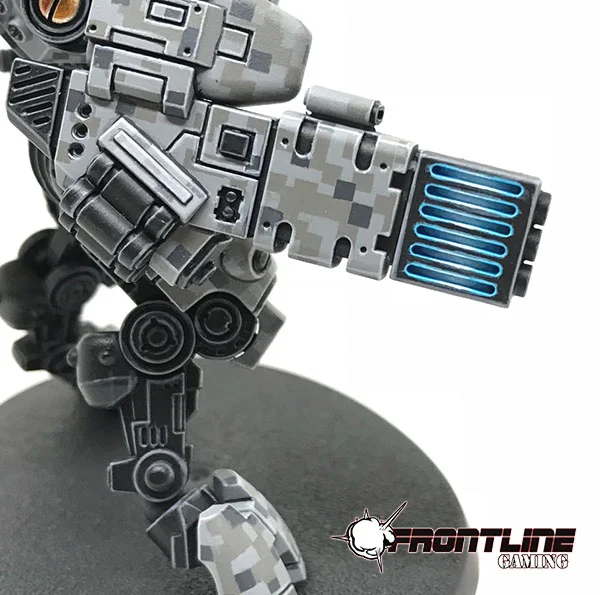
This awesome T'au miniatures painting commission came out fantastically! It features painted interiors, a cool digital camo scheme, clean highlighting and some nice touches such as OSL on the weapons! Consider us for your next commission!


Hey guys, Cavalier checking in, commission painter for Frontline Gaming and co-host of Splintermind: The Dark Eldar Podcast back after a health-hiatus with a return to my Harlequin Detachment Development series. In this installment I’ll be featuring one of the most important aspects of creating a Harlequin force, simplifying the painting process of those damn diamonds!

So initially I was going to go for a custom scheme for a home-brew Masque, but after much encouragement from my fellow co-host and prolific painter Brian, I decided to embrace fully the Y’nnari theme of my army and go with the Penumbral Masque. Not only does it have an awesome name, match my fluff but the color scheme is perfect for both halves of my Aeldari colletion, tying in my red + gold from my Lions of Asuryan, but also the all-black of my Umbral Watchers.
This color scheme is extremely easy to work with as straight black and white of the checker pattern looks better in my opinion WITHOUT highlights which is a big time saver.
Furthermore the colors used for the checkers go on extremely easily. I would highly recommend staying away from yellows and oranges, at least from the GW line as they require a lot of layering.
So in selecting a color scheme, particularly in regard to the checkers choose paints you are familiar with and that apply easily, because even with a simplified approach the checkers still are moderately challenging.
So without a doubt the hardest part of painting Harlequins is the diamonds. While not completely necessary for those hobbyists wanting to get a classic looking Harlequin force on the table, you gotta have those diamonds!
So when I first started I tried to follow the GW tutorial and found it extremely challenging. The technique is basically laying down a grid of lines that create a diamond pattern, and then simply filling in the diamonds. Even being known for my clean and classic style, I made a total mess of models and even had to strip them and start over again. The problem with that approach is that if you screw up the width between lines at any point, it ruins the pattern completely and going back and fixing it is a nightmare because it requires adjusting the entire grid.
I tried a number of other approaches after that but eventually found a style that enabled me to paint these minis far, far faster. So whats my secret you ask?
Simple. Paint one diamond at a time. Here’s how!
So to begin with I layed down a nice clean layer of Celestra Grey. As you can see this looks almost pure white even at this stage. This color is amazing and goes down over any other color, even black, like a dream. Again having a color that applies easily is super important, as even when you get the hang of the diamonds, you will have to do a good amount of clean-up and adjustment.

Lay down that first diamonds. My advice is to lay down the diamond that will establish the central chain of diamonds on the front of the model. In this case going down the center of the leg. Take your time and make sure the placement and size is to your liking.

Establish the grid and fill in a few diamonds to get a feel for how it’ll look across the model. This step will give you a little preview of the finished product. So if you find the colors you chose are a nightmare, or the size is wrong, this’ll give you a chance to bail out or proceed forward. It is at this step that you’ll feel the advantage of my approach as each diamond doesn’t need to be a perfect replica of the others to convey a nice clean diamond pattern, as you can make minor adjustments in size and angle in tough areas of the model (like under the coat, or where the pattern meets the belt).

Complete the grid and highlight! In my case since I wanted a pure black and white scheme so I opted to forgo highlighting the diamonds. However I brightened up that Celestra Grey diamonds, filling them in with pure Ulthuan Grey, the exact color match of Corax White primer. This is one my biggest secrets to get pure white on my models with out using Ceramite or Skull White which are fickle beasts.

Repeat the pattern on any other areas of the model that you want rocking those diamonds, then paint the rest of the model! For those curious as to my approach on the red and gold, you can refer back to this article on all those tips and tricks.

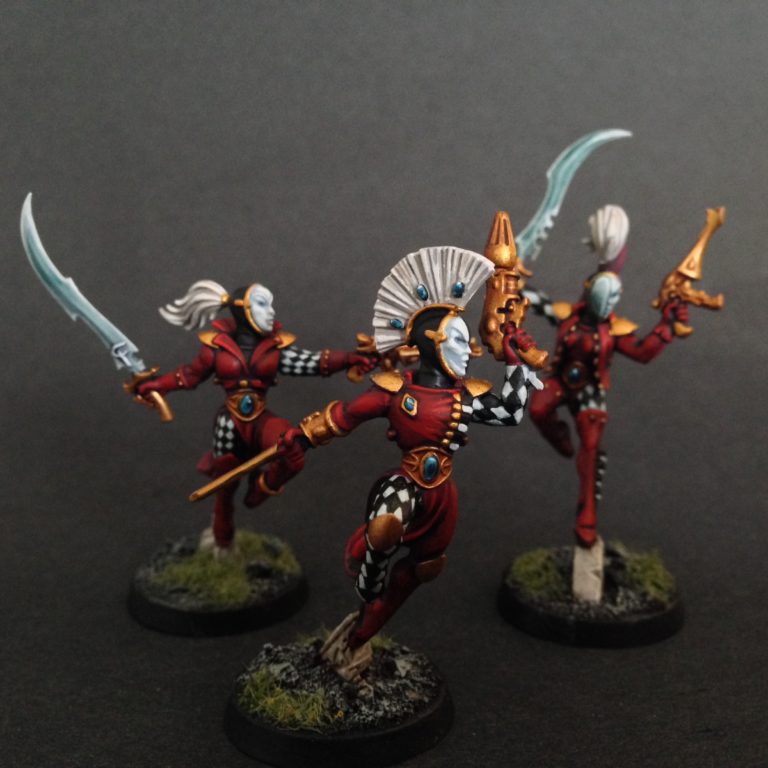
So after many tears of Isha were wept in frustartion, I figured out this approach and was able to finish up my a Troupe Master + 5 Troupes resulting in my first mini-detachment of Harlequins!
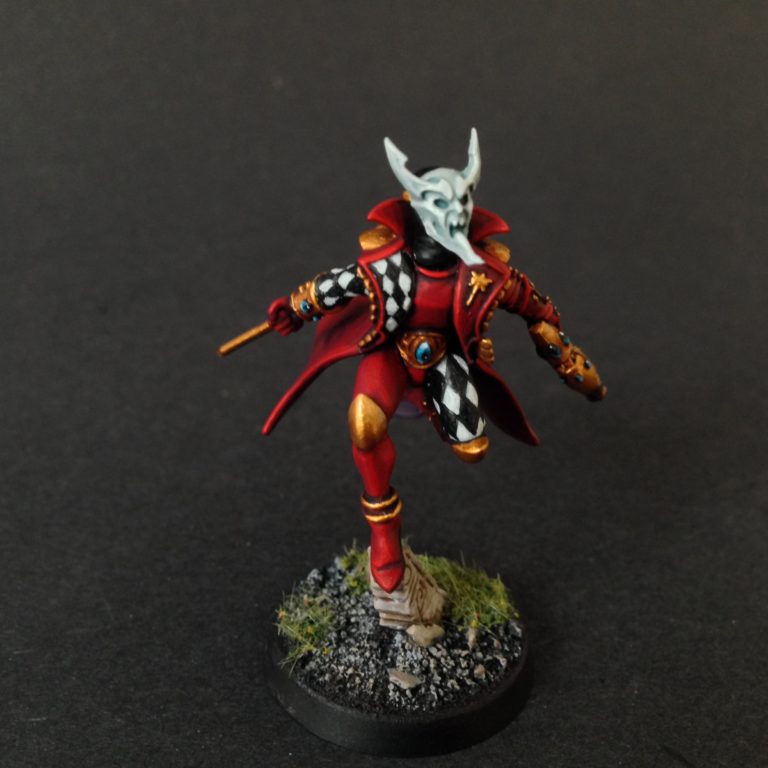
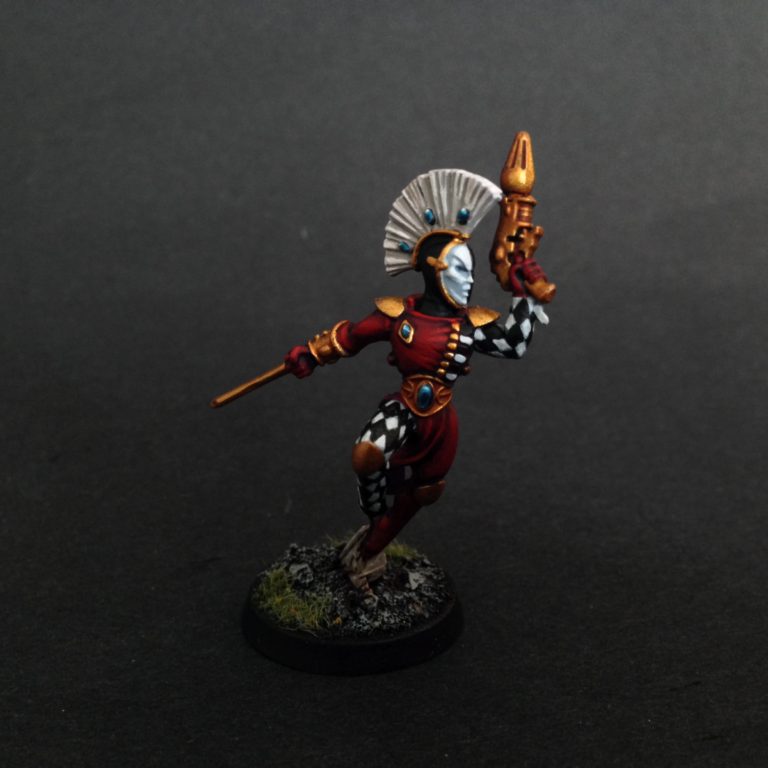
My Troupe Master- By far my fave dude so far

So I hope you guys found this article useful. It was definitley a challenge finding an approach that works for me, but hopefully this’ll save you some of the growing pains. Big ups to my fellow battle-bros over the at the Splintermind Facebook page who’ve been getting it done with us in our Harlequin painting challenge. For inspiration head over there and check out the amazing work, especially by Richard McManus!
Next up in the series is how to paint the Starweaver using a stencil! This’ll be a first time for me so hopefully it’ll help all my fellow newbies out there, so stay tuned for that.
Finally if you are interested in exclusive Dark Eldar and all things Aeldari coverage check out our podcast Splintermind the Dark Eldar Podcast, where we tactics, hobby, lore, interview Black Library authors all as it relates to the Eldar factions. Thanks for stopping by!
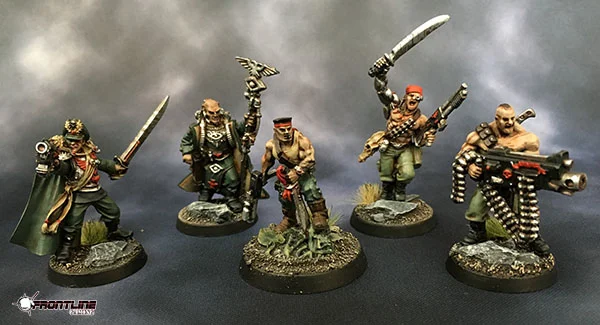
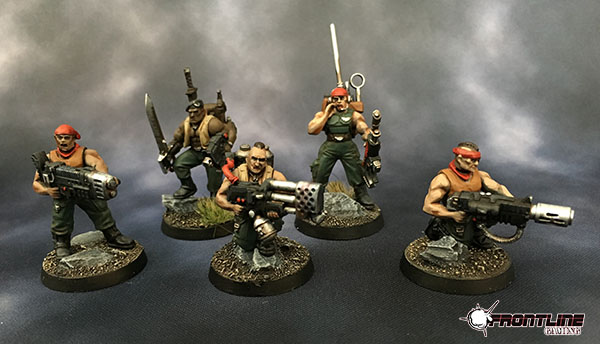
The FLG Paint Studio recently completed this miniatures painting commission consisting of Catachan Jungle Fighters of the Astra Militarum! This is a Tabletop commission with basing ranging all the way up to level 3. Tabletop commissions look great but are also very affordable. Consider us for your next commission.


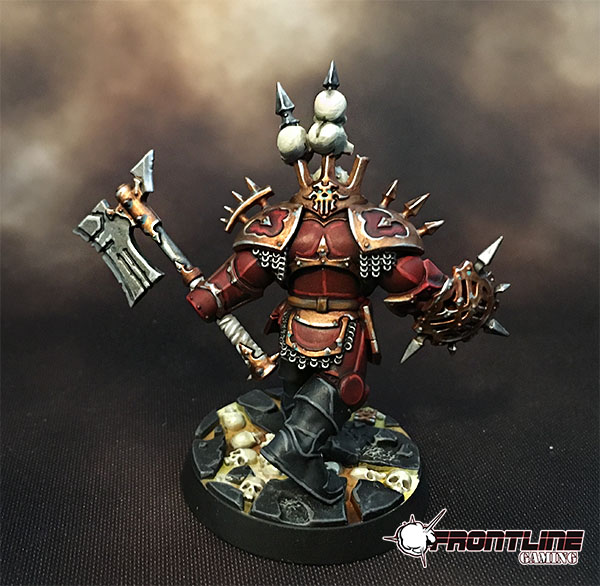
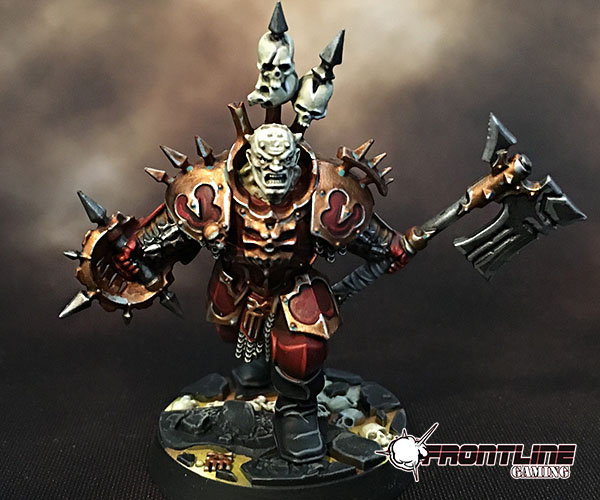
This awesome miniatures painting commission was recently completed by the FLG Paint Studio! It's a stunning centerpiece model and will turn heads at the next game night.


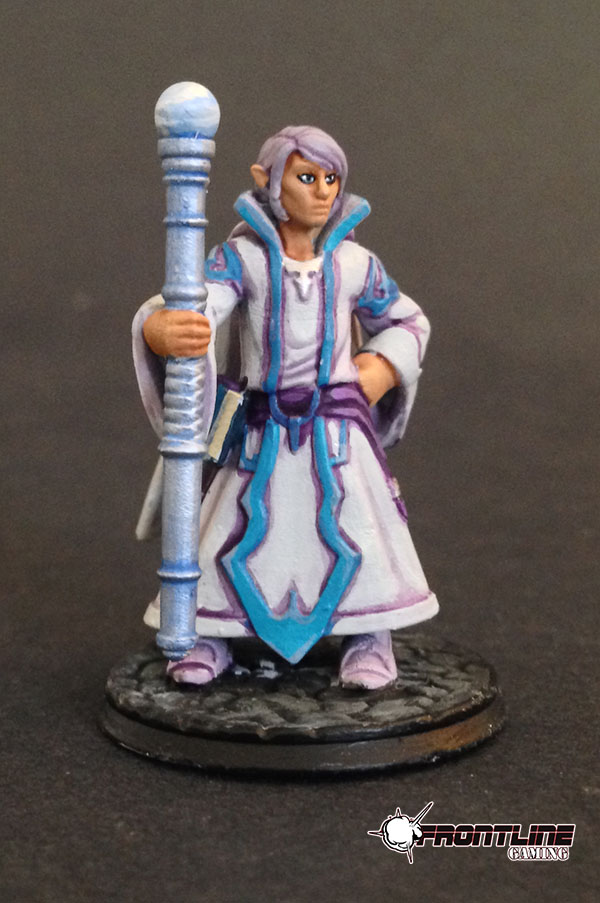
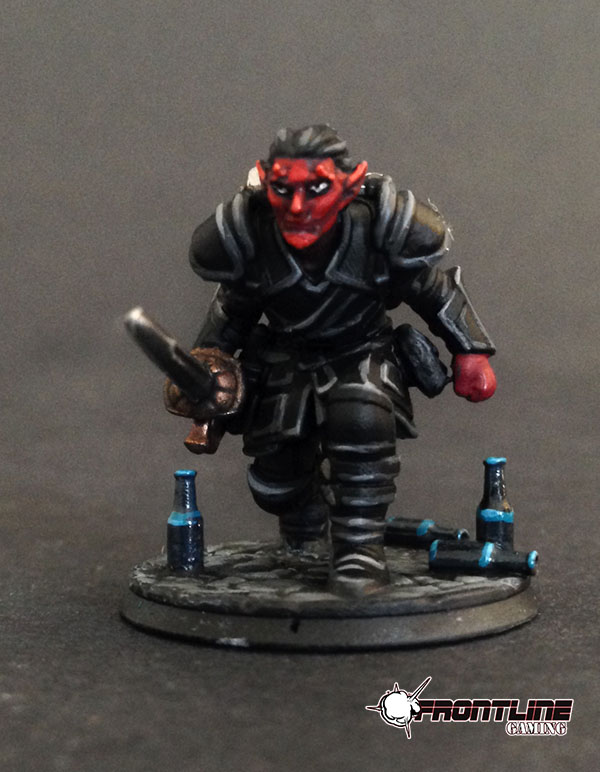
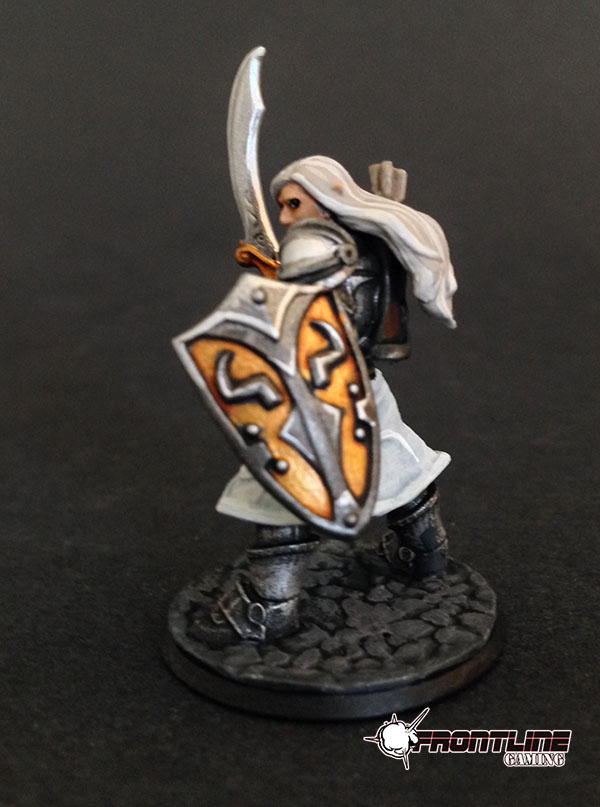
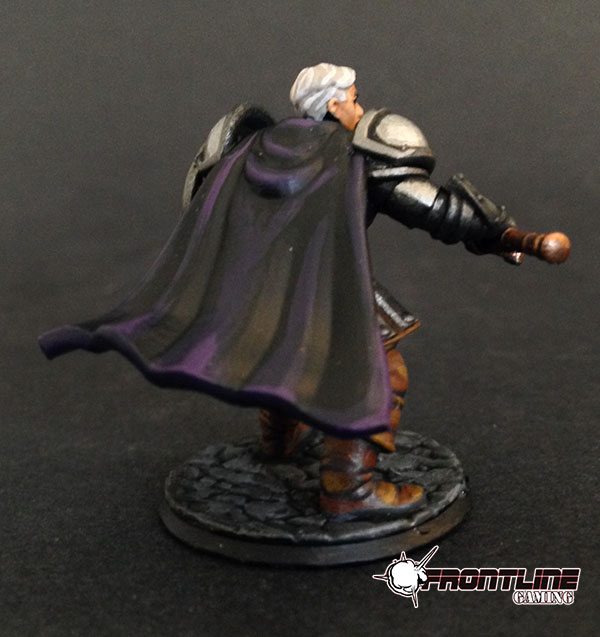
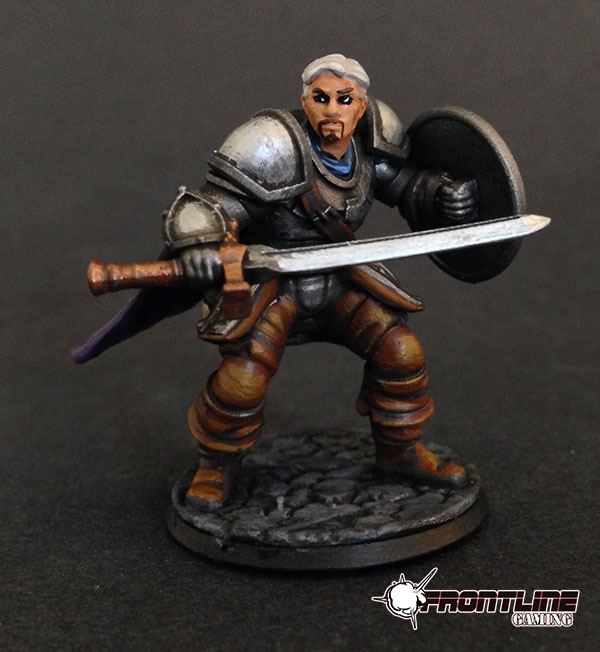
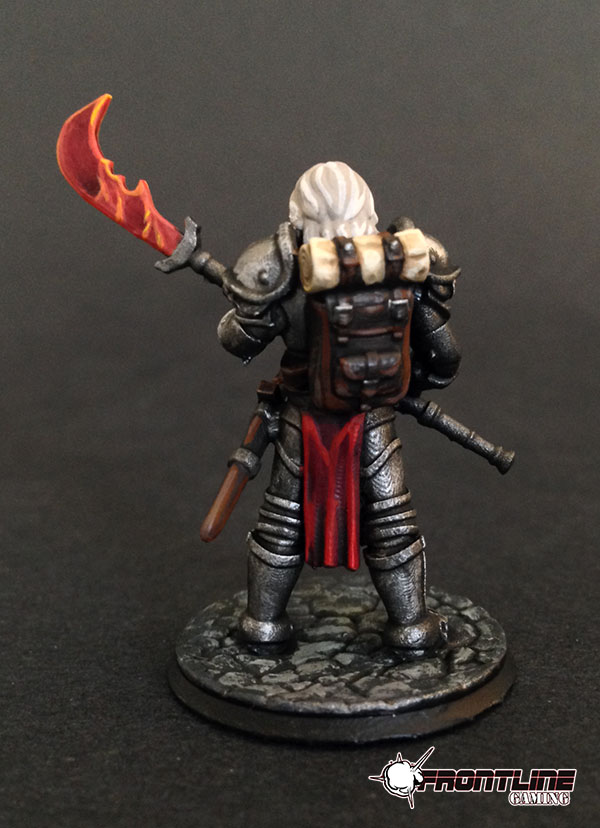
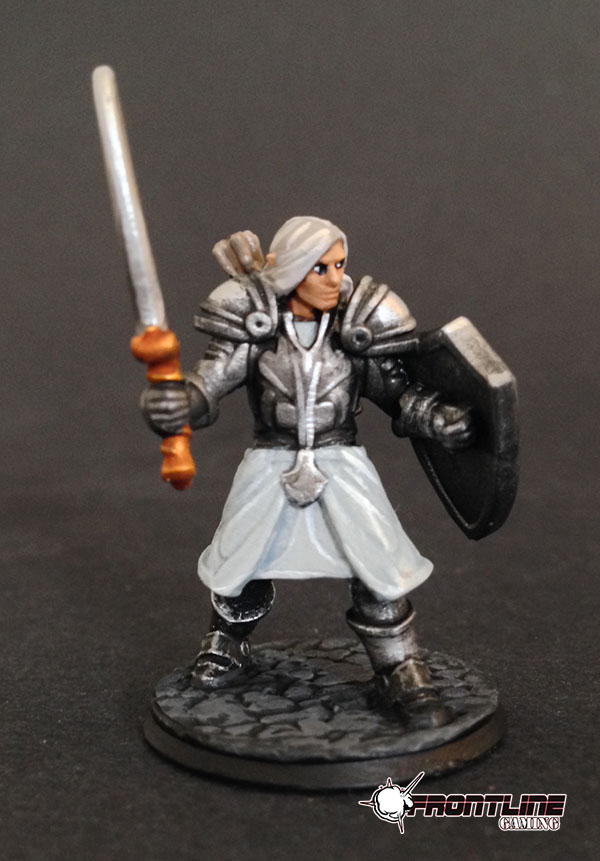
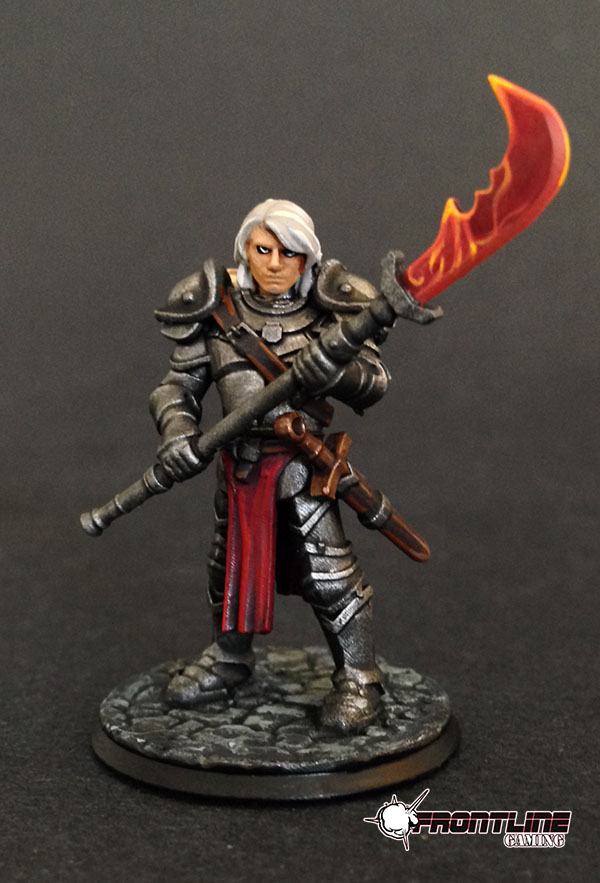
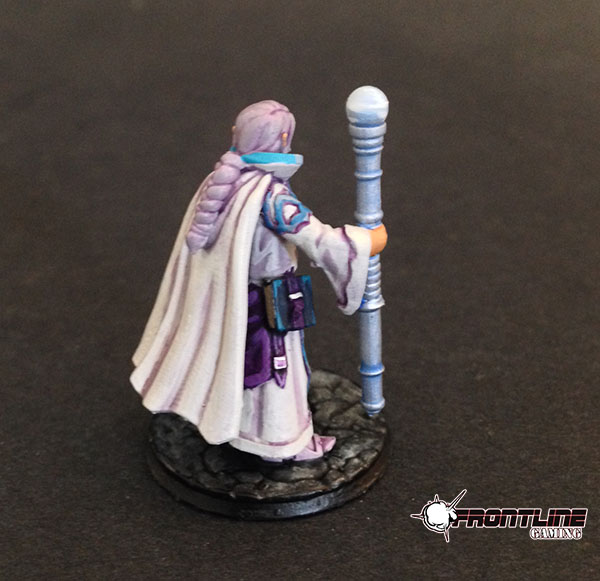
When commission painting miniatures, we very much enjoy the opportunity to paint RPG minis as they help to bring a campaign to live and make it memorable. Over the years we've had the opportunity to paint quite a few miniatures for our client's campaigns and it has always been a point of pride to produce quality work at a fair price. Take a look at this recent miniatures painting commission we recently completed for a client to get their custom Hero Forge minis ready for adventure!
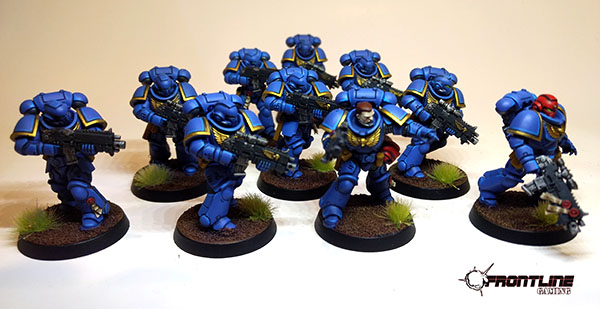
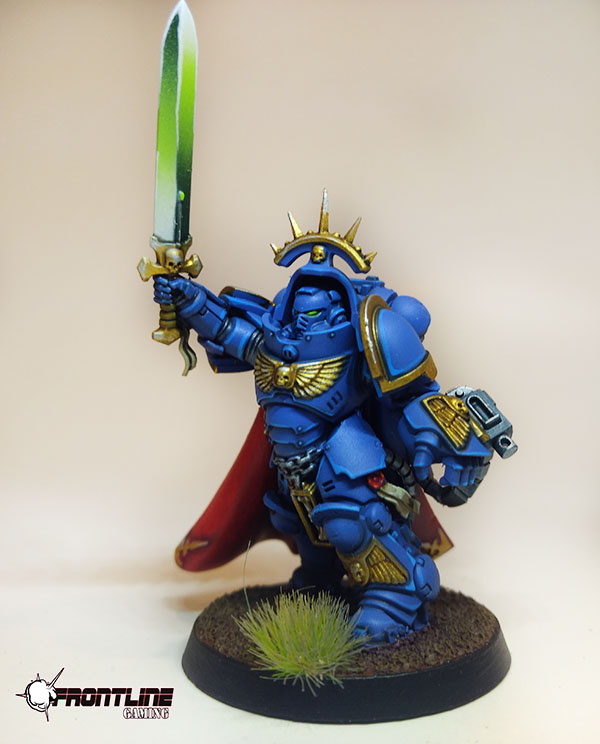
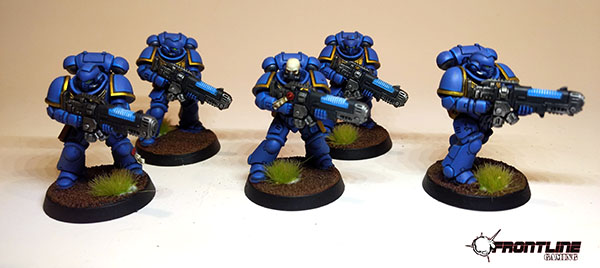
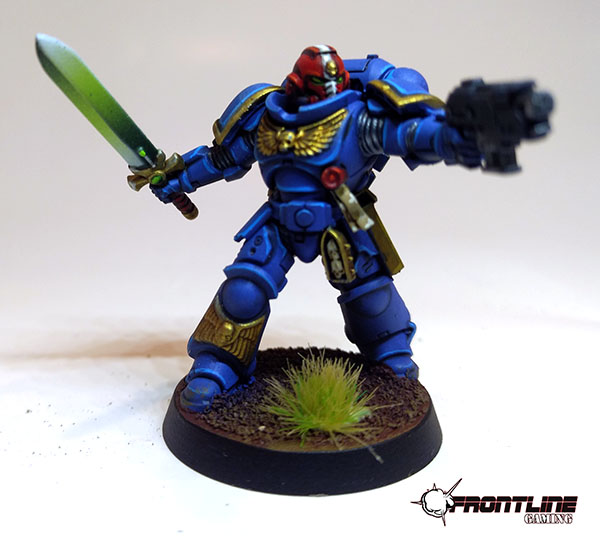
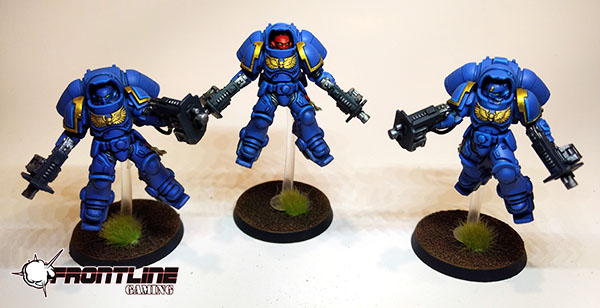
This is the second half of the Dark Imperium miniatures painting commission we recently completed. You can see the Space Marines in the blog post below.
These Tabletop level minis look awesome and the level two basing really finishes them off nicely.


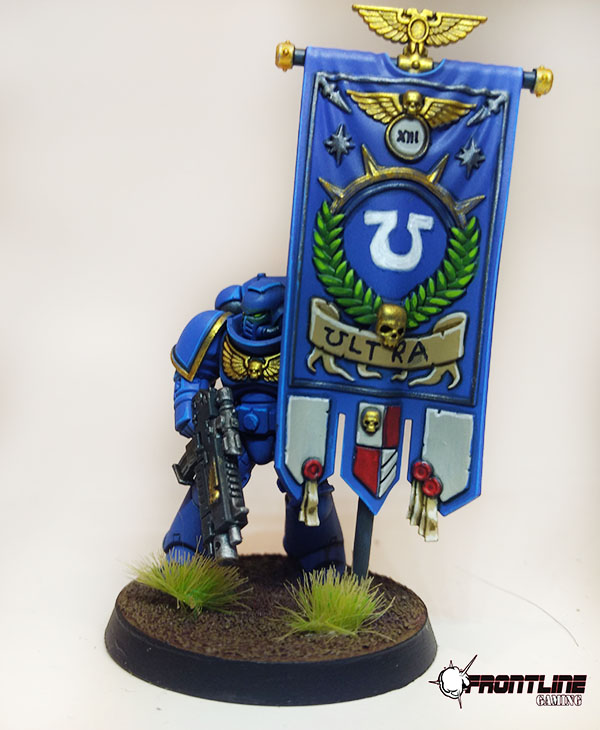
This awesome miniatures painting commission came out great! Ultramarines Primaris Marines. The level 2 basing really makes them pop.

We recently completed these miniature painting commissions of two Shadespire Warbands and they came out great! Shadespire is a fun, skirmish scale miniatures game set in the Age of Sigmar universe. It is played in quick, competitive games using dice and a deck of cards.
These smaller commissions give the artist a chance to really show their stuff with high level paint jobs to make sure that your warband looks as awesome as possible! The two pictured are Magore's Fiends and the Farstriders.


Hey guys Cavalier here, commission painter for Frontline Gaming and co-host of Splintermind the Dark Eldar Podcast here today with another painting tutorial. This time I’m discussing my approach to painting liquids.
Now for this commission here, its a Tabletop + commission which means we are working with a limited amount of highlights and blending. You can definitely do a lot more when painting liquids, but this serves as a great foundation and works well when applied across a large force such as Drukhari Wyches which have vials of combat drugs on every model!
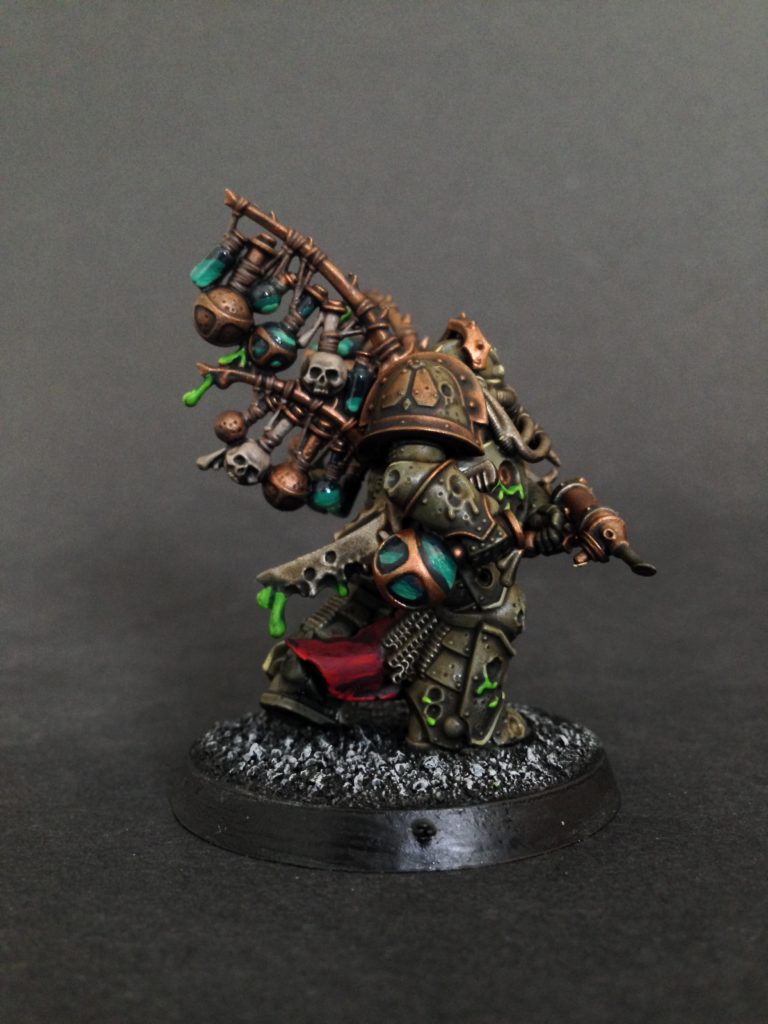
So for this project we’ll be looking at the Biologus Putrifier a great new model for Death Guard. Now as you can see below the model is nearly complete, so I wont be going over how I got to this stage. If you are looking for a tutorial on how I paint Death Guard in general, refer back to this article my Single Highlight Death Guard Tutorial. This is more about fine detail work.
STEP 1: So to begin with I paint the vials Stegadon Scale a great paint from GW. I also like this color because it can take the all the washes I apply to the model as a whole, and it only adds to the look of the liquid.

STEP 2: I then hit the vials and bottles with a trio of washes: Nuln Oil, Agrax Earthshade and Seraphim Sepia, this produces a wonderfully grimy look to the bottles and gives a subtle mottled effect to that once solid Stegadon Scale.
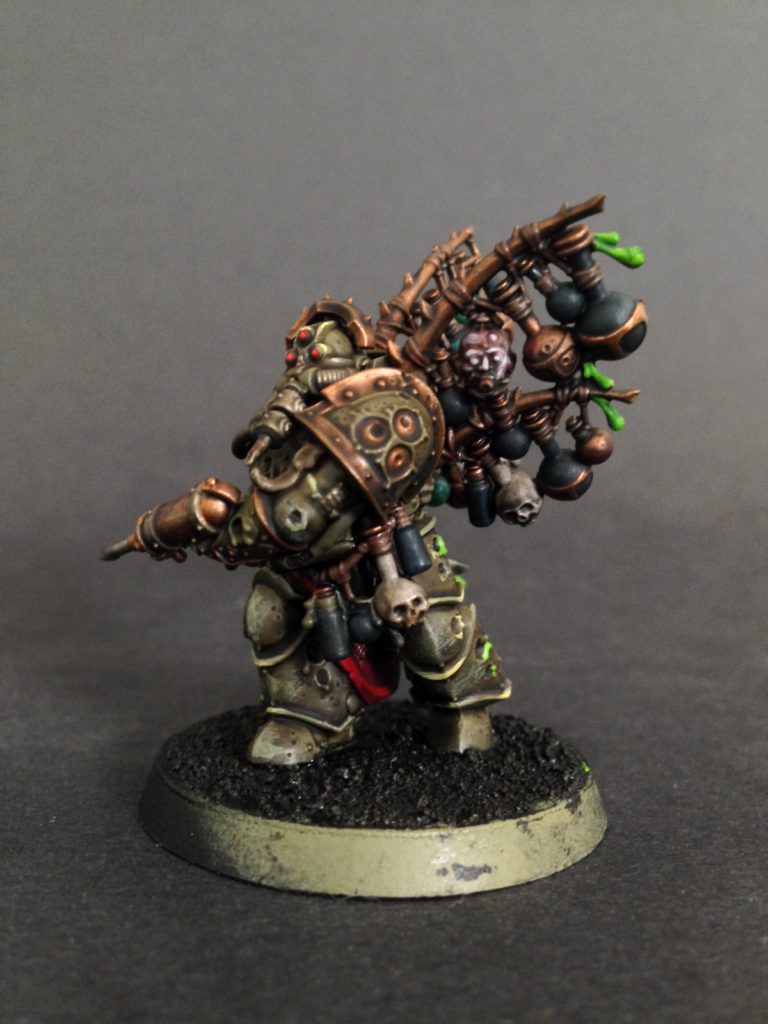
STEP 3: Now normally I’d do a little clean-up and restore some of that Stegadon Scale to a more solid color, but the murky effect really works for this model. But just because that “clean-up” stage is mandatory for a lot of colors, doesn’t mean its a universal rule. If you like the way something looks and it works for the effect you are going, go with it! By leaving the Stegadon Scale with all the miscellaneous washes over it, it gives the appearance of “disturbed sediment” swirling in the bottles as the Plague Marine tromps across the battlefield.
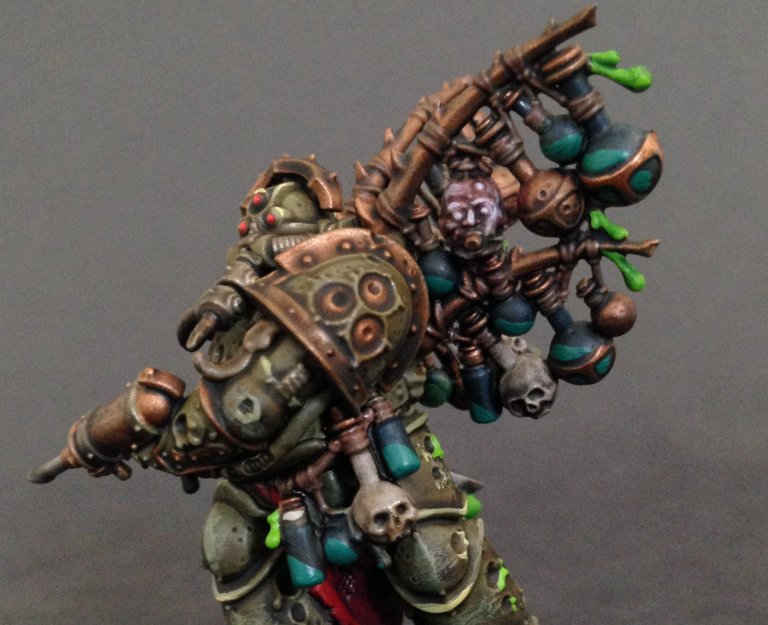
With that idea of sediment in mind, I paint a solid coat of Kabalite Green in collected little pools, with the meniscus line angled as such to make it look like the “heavier” liquid within these foul potions has shifted forward in the direction the bottles and vials are leaning. Thus if the vials and bottles are leaning forward, you paint them in the forward bottom portion of the vial/bottle. Just think of it as a bottle of pond water with mud and sediment at the bottom of the bottle.
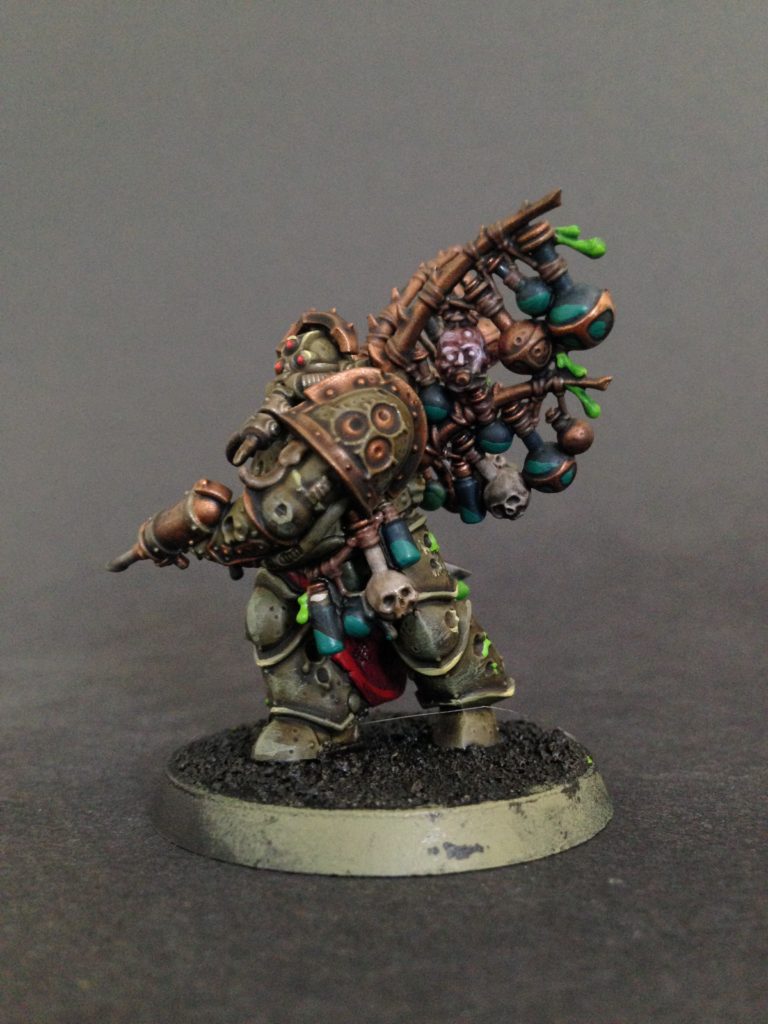
Step 4:
Now repeat the same process just splitting that Kabalite Green “sediment” in half with a layer of with a 50/50 mix of Kabalite and Sybarite Green. After that repeat the process, splitting the mixed half Kabalite/Sybarite Green with a layer of pure Sybarite Green.

Final Step: Now for the easy part! Hit those bad boys with a ‘Ard Coat (a gloss lacquer) and you are done! With a more advanced paint job you do sparkle effects and more highlighting to go for more ethereal look to the potions, but even painted to this standard you’ve managed to establish some very nice eye-catching details that’ll look good at any angle. The ‘Ard Coat does a lot of the work for you picking up the light in a really cool way.


So I hope you guys found that useful. It can really bring a model to life when you know how. If there are any techniques, simple or complex that you guys are interested in, please let me know in the comments section below. Stay tuned and I’ll be back next week with another article.
Also if you are interested in exclusive Dark Eldar and all things Aeldari coverage check out our podcast Splintermind the Dark Eldar Podcast, where we tactics, hobby, lore, interview Black Library authors all as it relates to the Eldar factions. Thanks for stopping by!
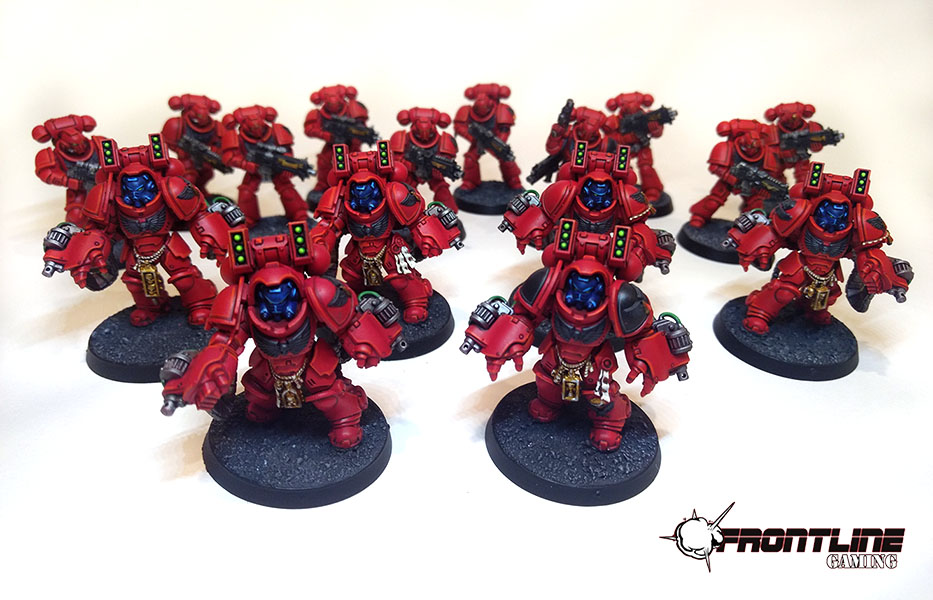
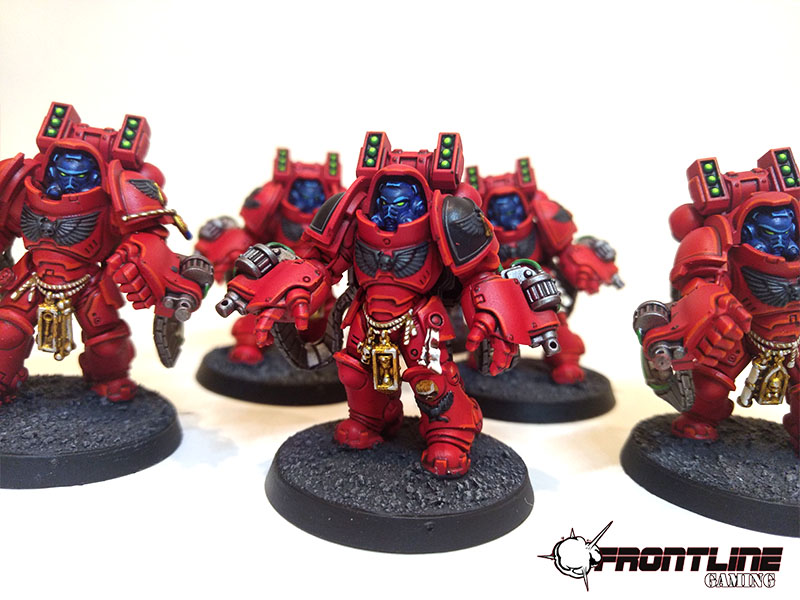
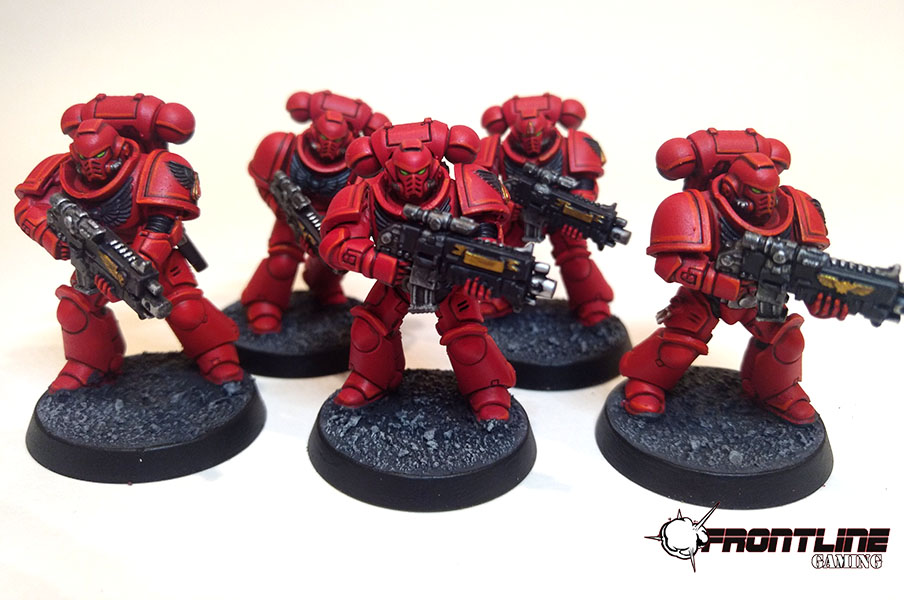
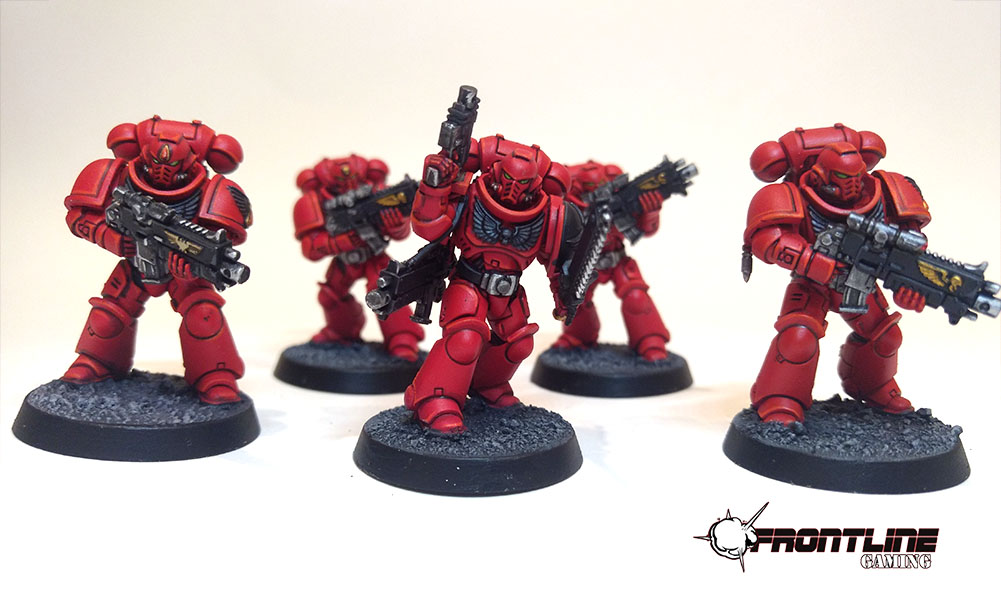
These great looking Blood Angels Primaris Marines were painted by the FLG Paint Studio!
These are a beautiful example of Tabletop quality models with level 1 basing for a nice clean look without breaking the bank.
Consider us for your next commission!
And remember, Frontline Gaming sells gaming products at a discount, every day in their webcart!